Sunday, June 29, 2008

Japanese Iris ~ Handling Seedlings in New Zealand.

Once your seed has been sown into trays or pots, continue to water then daily to leach out a natural chemical germination inhibitor which coats the seed.

The seed will begin to germinate in one's and two's in the first stages and then all hell will break loose and the sand will begin to rise up. Not to worry as you water the sand, it will settle around the germination of seeds. If the seed becomes exposed then just add a little more sand to cover that area.

Your little rice paddy has begun.


Once the seedlings get to about 4 cm (1 1/2 in) in height, I use the pointed end of a teaspoon to carefully lift each seeding from the seed tray.

With your finger and thumb of one hand you can easily pick up the foliage of the seedling and move the seeding into individual pots.

In advance I pre-fill my pots with a moist potting mixture and using the teaspoon I make a hole in the mix to accommodate the new seedling placing the roots deep into the soil mix leaving the green foliage above. The seedlings are then watered in with the watering can. I give then a watering daily and begin a light fertilizer programme of a weak solution of Phostrogen all purpose soluble food. Use every 7 days to feed the foliage and growing roots of young seedlings.

They grow quite fast once they have germinated and if they get away on you, clip the tops of the seedlings back to about 4 cm high ( 1 1/2in), then prick them out of the tray into individual pots.

The roots may be staring to get quite long and string like so I trim these back a little too with the scissors to give the young seedling some balance with transpiration and reduce the shock of the move.


Once the plants become well rooted in the pots they are ready to line out in your open ground area to grow on. This will be early summer planting.

I place my pots on a bed of sand as the roots can then take up more moisture from the sand as required if a watering is missed that day.

Once you have pricked out the number of seedlings you need, you can then calculate the area of ground needed to plant them out in.


If you have sown a random mixture of seed then just select the biggest and the strongest of seedlings in the tray as they just keep on coming. You will need to be firm with yourself and discard the rest of the germinating seedlings once your number has been achieved.

I use the calculation of one plant per 40cm (16in) apart in a row and space my rows 60cm (24in) apart. Once you know the size of area you can begin to either cultivate the soil or spray out the marked area with roundup to kill off weed growth. When the area of weed growth has began to show signs of dying off, cover the area with a thick blanket of barley straw 12 cm to 15 cm ( 5 to 6in) or pine needles.

What you take away... mother nature wants to put back. This cover will stop more weed germination again while helping you to control future weeds.

Large areas can be cultivated ready for the planting of your seedlings once they are about 25 cm - 30 cm (10 - 12 in) high. Do not be to worried if they grow taller than this if weather does not allow you to begin planting out, you can easily cut back the tops before planting.

Additional Information.
In the book "The Japanese Iris" by the Late Currier McEwen, there is notes on handling seeds and growing of seedlings for those living in the United States where seasons of growth are quite short and prolific. He discusses the growing of seedling both outdoors and indoor under lights.

In 'The Review", a publication of The Society for Japanese Irises. The fall issue of 2001 has a great article written by John Coble, of Michigan. It is titled "How to become a Hybrider " is which John writes about how he handles his seed and soaking of seeds before chilling in the refrigerator and growing under lights also planting outside for spring germination.

Saturday, June 28, 2008

Japanese Iris~ Collecting from Seed.


Collecting the ripe seed pods begins in late summer /early autumn. The pods once fertile being bee pollinated, swell and when mature they turn brown making them ready to pick. Harvesting these is best done before they burst open and spill the seeds onto the ground. You can collect the seed pods at random being bee pollinated seed pods or if you want to try to breed some new cultivars then selective hand pollination can be done earlier in the flowering season.

In named cultivars, it is recommended that you remove the seed pods before the seed falls. Once the pod ripens, the seeds spill onto the ground and fall down in amongst the lower base leaves and can germinate the following spring. This will cause your prized named variety to produce plants different from the original and your named variety will then in time be lost.

After picking the pods, I place the pods in small brown paper bags or envelopes. Bottle store paper bags are great for this. I give a quick spray inside the paper bag of fly & insect spray (
a 30 day kill) to take good care of any earwigs or chewing insects that may want to chew any seeds.
The pods will then dry out. I staple closed to seal and label the bag with the details of variety or colour selected. Store in cardboard box in dry place.

3 months before wanting to sow my seed I then clean the seed from the pods and discard the spent pods. Normally done on a cold winters night while watching the TV.


The seed is then left in a tray to dry over night for big lots or smaller lots are put into envelopes and marked as to which variety was collected and a date. This is to identify your seed source of pod parent in later years should you wish to register a new exciting variety.

My simple method of ID is the year.
eg: 2008 = 08 then the number given 001 or 002... etc. This info is written on a plastic label 08/001 when they are sown in trays. This number stays with the seedlings when pricked out and with the plants once planted out in your growing area.

Each lot of seed of different varieties can then be numbered and the relevant information of plant name collected from can be recorded in a seed dairy for future reference.

About 12 weeks (May) before spring ( August) I take the seed that I have cleaned and place the envelopes with any lose seed in a plastic bowl. I cover the bowl with a plastic cover as not to let any moisture or food stuffs, drip or spill into my bowl. A plastic bag can be used instead of a bowl for smaller lots of seed.


I then place the bowl in the bottom of the refrigerator or veggie compartment and leave undisturbed for 12 weeks as the seed needs stratification to germinate. The chilling period breaks down one of the germination inhibitors in the seed.

When placed at the bottom of the fridge the cool air remains in that area as the door is opened and closed with frequent daily use.


At the end of the time frame I then prepare a seed tray with seed raising mixture filling the tray to about 3/4 full and firm the seed raising mixture while leveling off the mixture to form your seed sowing area. I loosely scatter the seed across the soil mixture or place divisions in between different lots of seed to keep separate. Then gently cover the seed with washed dry river sand to a depth of 1.5 cm ( 1/2 in). This is then placed in a warm sunny area and watered in with the watering can and covered with a sheet of glass. The idea is to keep the sand moist all the time and should be watered daily or when it shows signs of drying. By keeping the water flushing through the sand this leaches out another germination inhibitor in the seed.

Germination will begin in 2 to 3 weeks from the time of sowing the seed and can continue for about 3 weeks after that. The glass sheet can then be removed once germination begins, to allow the seedings to develop and not become to drawn to light. As you water the sand it will continue to settle around the germinating seedlings as the seeds begin to germinate and will anchor the seedling into the seed raising mixture forming nice white roots.

Remember to keep the sand moist all the time.

Friday, June 27, 2008

Iris ensata species in New Zealand.

Japanese Water Iris. ~ Iris ensata ~


Family
~ Iridaceae ~Iris family.


Genus
~ Iris L. ~ Iris.


Species
~ Iris ensata ~ Japanese iris.

Iris ensata is a rhizomatous, beardless Iris species that is found growing wild all over Japan. It also grows naturally in Manchuria, Northern China, Korea, and Siberia.

This hardy perennial has attractive fountain like foliage. The leaves are dark green sword - shaped leaves (the word ensata meaning sword- shaped) 20 - 60 cm (8 - 24 in) long with prominent midribs. It is widely cultivated in some parts of Japan for edible starch contained in the roots. The fibre from the leaves is a substitute for hemp and has been used for making rope, coarse cloth, thatching and basket making. The roots are very fibrous and can be used for making brooms, brushes etc.

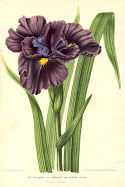
In mid summer tall spikes of flower stems emerge and tower above the soft reed like foliage in mass profusion. A single flower opens into a impressive 3 petal red purple flowers 7.5 - 10cm (3 - 5in) across with erect standards and pendant falls. The flowers are hermaphrodite (have both male and female organs) which is pollinated by insects with the plant being self fertile.

Cultivation I. ensata thrives in rich loamy to light well drain soils in a sunny position. This plant likes plenty of moisture. Requires a lime free soil which is slightly acid. It grows poorly in shade and does well where there is a minimum of at least 6 hours sunlight.

This is a excellent Bog garden plant and can be grown in containers in pond margins but must be kept in a dryer condition over the winter otherwise the plant will go backwards and not do well in the following season and may die.

Propagation~ Seed collected from ripe pods sown in cold frames or seed trays.


~By division of the dormant rhizomes in winter or early spring. Larger divisions can be planted out into the garden while small clumps can be potted up and grown on in cold frames until they have produced good roots then planed out in the spring.


Cultivars~ Some are named forms of species but these have been developed for their ornamental value and not for their other uses.


Sunday, June 8, 2008

Hosta Journal


S
hady Characters for those cool places.

Hostas ...
Hostas ...
with more Hostas.
The thrill of growing Hostas in your garden is very rewarding by providing so much pleasure in the cool, damp and shady places of the garden bringing great colours and leaf textures to often dull areas during the spring and summer seasons.

Eight years ago I took the plunge in joining The American Hosta Society (AHS) in my quest to find more information about these beautiful plants that I had developed a passion to die for. In this post I wish to share with you on how you too can get a good fix.... on growing these majestic plants.

Last Friday I received my Hosta Journal Volume 39, Number 1 which is posted to me 3 times a year in the form of a journal publication with updates including new Registrations of Hostas from the past year.
It is full of fabulous photo's of the latest available around the Globe from up and coming hybridizers and growers with a strong passion and dedication to their Hostas.

This latest Hosta Journal contains some of the following articles;
# 2008 Benedict Garden Performance Awards by Chuck Zdeb. Garden performance Awards of Merit of a years evaluation of hostas in trail garden situations to bring out the best of the best of Hosta performances.
# Questions and Answer: A section about questions and answers in this issue is given to streaking and the problems of global warming on growing Hostas.
# The Sports Page: Sports of Hosta 'Striptease' by Joshua Spece. H. 'Striptease' is a sport of Hosta 'Gold Standard', which is a sport of the chronically unstable H. 'Fortunei Hyacinthina'. Joshua describes about his wonderful journey of discovery with beautiful photo's of H. 'Striptease' which has a credit of 29 new sports which are all different to the original plant registered.
# Hybridizing: The Bees Don't Know You Goals by Don Dean. How the author carefully selected pod and pollens parents in his quest for better blues.
# The Hybridizer's Notebook: Things That Worked and things That Didn't by Steven Chamberlain. Many hybridizers experiment broadly with various combinations of pollen and pod parents. This discusses what works and what does not.
# Hostas in Scotland by Stephen Barker. The author writes about the collections of Hostas in Scotland and gardens operated by the National Trust and Historic Scotland. Stephen has a collection of over 850 hosta varieties.
# Trails and Tribulations: Growing Hostas in a Damp Climate by Ian W. Scroggy. Ian is from Carnlough, in Northern Ireland. The author writes about his high rainfall and his success in growing potted hostas on benches to allow excess water to drain away.
# Royal Hosta News from Britain. News about His Royal Highness, The Prince of Wales, becoming Patron of the British Hosta & Hemerocallis Society as from 1st January 2008. His woodland garden at Highgrove House in Tetley, Gloucestershire, is known for its fine hosta display.

The Hosta Journal publication offers the latest information on care, feeding, and hybridizing; pictures of new cultivars; and news of upcoming meetings and conventions both in the United States and around the World.

This publication is compiled by Editor "Bob Olson" for members of The American Hosta Society (AHS). This is a non-profit organization. The AHS is organized exclusively for educational and scientific purposes, and especially to promote, encourage, and foster the development of the genus Hosta and public interest therein.
International Membership is either 1 year to 3 years payable in USD dollars and well worth the investment for those serious about their Hostas.

Please visit the web site of the AHS, www.hosta.org to learn more about the Society also one can subscribe to becoming a International member (Pacific Rim for New Zealand) online with the use of a credit card. Yearly membership is from January 1 through December 31 each year.
So if you are a Hosta lover from around the Globe and would love to receive quality Hosta information plus other benefit's of being a member, you should give serious thought to joining The American Hosta Society.

I would like to express my thanks to The American Hosta Society (AHS) and the Hosta Journal Editor and Authors in their articles of The Hosta Journal, Volume 39, Number 1 from which information contained has been used in the creation of this post.

Monday, June 2, 2008

Siberian Iris in New Zealand....So where to begin?


The weather seasons of the Manawatu in the late 1980's /early 1990's had become unsettled and brought much rain during the spring and summer months which made growing breaded irises somewhat of a problem with so much rot in the rhizomes that I need other types of Iris to cope with the moist soils of the garden.

My first Siberian iris along with the Japanese irises that I had, did so well and surpassed the expectations of all my other irises with the excepting of the water loving irises. I. louisiana and I. laevigata.

In the Siberian irises, one cultivar in particular stood out from all the rest. This was called I. siberica"Caesar's Brother" which was introduced in the early 1930's.


It had grown so well that I divided 20 huge ten year old clumps for replanting in a wet area of my lawn around some Silver birches. Once I had sprayed this large area of lawn for weeds, It was now ready to complete the next stage. With the generous help of my friends and myself, we began the task of planting the iris divisions during mid winter into the soil spacing them about 1 metre apart to allow them to grow as individual plants on mass in a drift. 1400 divisions formed this huge drift and at that time I could only imagine what they may look like as time progressed to grow into huge clumps themselves. As the years skipped by in the third year these plants produce thousands of magnificent blooms all over the drift of Siberian iris plants. The flowers lay like a carpet of deep sea blue floating in the breeze like butterflies in flight.


I. siberica "Caesar's Brother" continues each year to provide an impressive display.

As the years roll by, these plants that grow into clumps will in turn need more freedom to grow and flourish so by lifting the huge clumps and dividing again to put into fresh soil should be done in order to give that fantastic display of our achievements we planted all over again.


So where to find more Siberian iris. Many of the nurseries in New Zealand have a very poor selection of varieties available to purchase. Many of the same variety had different names.

There are a small handful of specialised growers in New Zealand that have an exciting range of culitvars which is hoped that these irises will been seen on the New Zealand market over the next few years.

Additional info:

I. siberica "Caesar's Brother"
is a rich dark blue - royal purple which was introduced by the pioneer Canadian breeder of Siberian irises, F. Cleveland Morgan, in 1931. Three years after it's introduction this iris received an (HM) an Honorable Mention in 1936 and went on to win the prestigious Morgan-Wood award in 1953, the awarding agency being the American Iris Society. This is the highest award specifically for a Siberian iris.

F. Cleveland Morgan was a founding member of the A.I.S. His works of magnificent cultivars still enhance gardens around the world. His best known cultivars are 'Caesar', 'Caesar's Brother' and 'Tropic Night'.

This cultivar 'Caesar's Brother' is available in nurseries throughout New Zealand.

Japanese Iris in New Zealand....So where to begin?


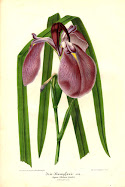
What a joy it is to walk in my little slice of paradise to take in the beautiful flowers of the Japanese iris seedlings of Iris ensata.

I first discovered these wonderful herbaceous perennial plants when I was given a few Japanese Iris upon visiting the gardens of the Late Frances Love in Carterton.

Frances gave me two Japanese iris plants to take home and care for.

One was a 3 petaled deep blue unnamed seedling she had raised which had shown some promise of branching with multi stems producing multiple flower buds, the other was a variety called I. ensata "Rose Queen" a delicate 3 petaled rosy pink.

I began to grow these in a shaded area of my garden in which they competed with tree roots and only just survived in this somewhat dry and partly shady garden. After more advice from Frances, I released them from this position of the garden and gave them full sun with the soil rich in compost combined with old rotten animal manures with plenty of water. They to my amazement began to flourish. In the mid summer of December/ early January they produced an amazing array of flowers on very long stems. Each stem had only one flower with the 3 petals floating in space. A very intense rosy pink.


I. ensata "Rose Queen" left a very deep impression in my mind that I wanted to grow more of these beautiful irises.

The weather seasons of the Manawatu in the late 1980's /early 1990's had become unsettled and brought much rain during the spring and summer months which made growing Bearded irises somewhat of a problem with so much rot in the rhizomes that I need other types of Iris to cope with the moist soils of the garden.

The Siberian and Japanese irises that I had, did so well and surpassed the expectations of all my other irises with the excepting of the water loving irises. I. louisiana and I. laevigata.

So where to find more Japanese iris. Many of the nurseries in New Zealand have a very poor selection of varieties available to purchase. Many of the same variety had different names as people had renamed them as the labels became lost or destroyed by what ever means. The only avenues open to me was to grow them from seed or by importing plant material from growers of Japanese irises in the international arena.

So in my next posts .... I will begin my incredible journey to find new and exciting Japanese and Siberian Irises as I had court the iris sickness that one gets when one begins to crave for more.

Additional info:

I. ensata "Rose Queen" is rosy pink with darker pink veins growing 95 cm tall(38 in). This cultivar was erroneously introduced in1915 as I. laevigata 'Rose Queen' by Lilley in 1915 later to be Re -register by The Society For Japanese Irises in 1989.

This cultivar is available in nurseries throughout New Zealand.