Monday, October 27, 2008

Japanese Iris Propagation by Plant Division.

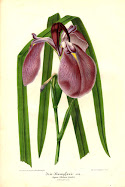
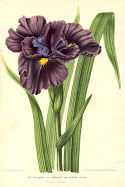
Division of Established Clumps.

You have just received you plant order....Gosh what can I do ?....


Some nurseryman will sell you bare root divisions from open ground. Once the order arrives, open the parcel, then soak the divisions of rhizomes in water.
In the water add a very weak solution of liquid fertilizer so that the roots can t
ake this up. After a few hours of soaking (up to 4 hours is enough to rehydrate them) they are ready for you to begin your planting.

I have brought plants from nurserymen and irises growers before from around the World so many times that it is now very easy.... For me...once the clumps of rhizomes have soaked.... I put them into large pots with a good soil potting mix.... most important is the plant label, writing the name top and bottom of the label. Labels do break now and then or are push hoed off later on, so id is important for me on those newly purchased varieties. Then I place all the pots together in a wood framed area so I can look after them much easier. Watering, weeding and light liquid feeding with fertilizer is made easy. Morning sun (4 hours minimum) and afternoon shade is a great place for them to recover and grow on. I take out my dairy and make a plan of what varieties are placed where in the cold frame. Just in case little fingers remove the labels as young children always want to play and white labels do have a fascination or push labels deep down the side of the pot. Then the following spring I would plant them out in a prepared open ground area or garden. Never leave them to soak overnight and swim.

Always keep in mind the Japanese irises love wet toes and dry ankles.
One can divide your plants either in late summer after the flowering season or early spring just as the new shoots begin to emerge.


Summer division.

One can take a division from a establish plant in the garden and divide from the plant about a month after flowering and just remove a decent size piece with soil from the growing clump.Trim back your foliage to about 25 to 30 cms high (10 to 12 inches) to reduce transpiration in the leaves. Lightly trim up any damaged roots and plant into prepared ground or in a large pot with good potting mix. The divided plant must have adequate moisture to develop new white roots at the base of the rhizomes to re-establish itself. I water daily with just a sprinkle of water to keep moist for about the first 10 days then once every 4 or 5 days from them on and as your plant begins to re-grow one can ease back on the watering. There will be some died back or browning of the old foliage as new leaves begin to appear as the plant produces new roots and recovers from its trauma.


Spring division.

In my photo's I have lifted a 3 year old clump in the very early spring while the foliage has died down and the new shoots are just beginning to emerge. I trim back the spent foliage to 10 to 15 cms ( 4 to 6 inches) so I can handle the clump better.

I take this clump to a washing area I have set up for division of my plants. I use a garden hose with a reasonable pressure to wash away the soil or mud from the dormant clump of rhizomes and clean it so you can see where to make divisions best. Once you have washed about half the soil from the clump and can see clearly where the rhizomes are, you can trim the roots to about 8 to 10 cms (3 to 4 inches) long and tidy up the top dormant foliage as well. Craft scissors I fined are the best.


Once I have a semi clea
n clump in front of me I take the kitchen meat clever. Safer to handle when chopping the clump up.


I divide my clump in half and then each half into quarters, Each quarter has about 3 to 5 new shoots or rhizomes. If you divide smaller, the pieces will grow, but need extra care and will take forever to make a good sized plants again. Please don't be to mean when dividing.

Discard any old spent rhizomes.


The plant divisions are the
n ready to plant out in prepared garden soil and watered in or placed into a large pot with a good potting mix to grow on till you are ready to plant them out.


Again you could h
ave a prepared area of straw on the ground in which you can line out your divisions.
Thus helping to reduce weed growth later on and to help also to retain moisture needed for the white root development and recovery
.


Refer to early blogs on seedlings.

Saturday, October 11, 2008

Manawatu Iris Show.


Regional Iris Flower Show.
~ 1st & 2nd November.~

Hosted by The Rangitikei, Wairarapa and Wellington Iris Groups


The Show is to be held at the Leisure Centre, 569 Ferguson Street, Palmerston North.

Open hours for the public are ~
1-00 pm - 4 pm Saturday.
10-00 am - 4 pm Sunday


~ ~ Admission is free. ~ ~


Sales table.
There will be excellent bargains to be had with named iris plants of all descriptions. Choice raffles and some great fertilizer deals for your plants.
Refreshments will be for sale for visitors to sit and relax over a cuppa.

Anyone is able to exhibit an iris they are growing.

Club members will be available to help anyone to stage their irises between 8 -9 am on the Saturday morning. It is a lot of fun, so please come along and give it a go.

The rules are as follows:

Venue open to stage entries 8.00am until 10.30 am Saturday 1st November.
No entry fee to e
xhibit.


Exhibitors do not need to be members of the Society.

All exhibits must be grown in the exhibitor’s own garden.
Exhibits must be left until the close of the show.


Those who wish to courier entries must make arrangements to have them staged and
collected. No responsibility will be taken by those staging for any damage that may occur.


Queen of the show will be judged as the best iris at the show. Each section will have a Best Bloom.


Naming- All NZ bred must be registered and named and cleared by the classification steward at the show.


Entry of psuedocorous or fetodissima will not be accepte
d at the show.


Vases and Newspaper will be provided.


Please feel free
to come
and enjoy
beautiful Irises ...


You would be made most welcome.


The Dykes Medal is awarded to a New Zealand bred iris. This is shared with Australia and New Zealand being awarded Bi-annually to Breeders of either country.


Here is Shirley Spicer receiving her Dykes Medal for 'Salute D'Amour' from Gwen Henderson in 2005


If you would like to join a local iris group and take part in the fellowship of these
groups in the following areas the contact are -

The New Zealand Iris Society,
"Alison Simpson", 'Limavady', R.D.9C, Oamaru 9491.

www.nziris.org.nz

Manawatu Rangitikei Iris Group.
"Carole Flyer," 5 Cohen Place, Palmerston North 4414.

Waiarapa Iris Group.
"Piki Carroll", Black Rock Road, R.D.6, Masterton.

Wellington Iris Group.
"Carolyn Goudswaard", 20A Epuni Street, Brooklyn, Wellington 6021.

Wednesday, October 8, 2008

Japanese Iris - Planting out Seedlings


I'm now ready to plant.

I load my seedling plants up on my trusty walker frame and head for the new Japanese iris planting area.


Again I use the string line to mark my complete row. I use a 6 metre length pipe marked at 40 cm (16 inches) spacing's and my string row lines are set at 1 metre (38 inch) spacing's between the rows. This it to allow for spraying or using the lawn mower between the rows of plants while they grow.


I prepare in a bucket a light solution of liquid feed using Phostrogen plant food
and water mixed.


I then take the scissors and remove 1/3 of the top growth from the seedling. This is because once they are planted out they are on there own to adapt to their new environment, to produce nice white roots to begin new growth.


By reducing the
top by 1/3 this helps in reducing the transpiration area which helps the plant retain its water better while recovering and putting out new roots below.


I then place the seedlings in the bucket of liquid feed solution and leave to soak for about 5 to 10 minutes.


I apply a very small handful of balanced fertilizer to where I will plant the seedling and thoroughly mix well into the soil.


I remove the plastic pot from the seedling and with the use of a long handled garden trowel I plant into the soil about a 2 to 3 cms (1 inch) below the soil line and firm the seeding in. I continue down my row. Once completed I then move the string line and begin the process again.

Use good plant labels as you go, this will identify your different hybrid crosses etc.

Write in a garden diary your plan and where each lot it planted in the row. Draw a plan . This will help you later when your memory has faded a little. Believe me it works a treat.

Then I spread straw along the rows to help with weed control.
Water in the rows if required with a garden lawn sprinkler.

Tuesday, October 7, 2008

Japanese Irises ~ Preparing a Site.

While your seedlings are slowing growing in the pots it is time to work out where you are going to plant them as the area you put them in will be use by these seedlings for up to two years.

Remember that Japanese irises "Need wet toes and dry ankles."

They require a good enriched heavy typed soil, slightly acid, well drained to slightly damp. Moisture is very important for good growth. A minimum of 4 hours and at least 6 hours of sunlight to induce good growth of your plants and to promote great flowering.
Once you have worked out the number of plants you have to plant you have a good idea where they will fit in your garden. Sometimes it is hard to throw the leftovers away so the idea is to set yourself a target number to be potted with a few spares in case some plants do not make the grade when you are planting them out.

Once you have selected your site there are two ways in which you can approach preparation of your planting bed.
The area selected has weeds or is part of the lawn area. So in order to plant your iris plants you must prepare the ground first.

You can do this by either -

(1) Spraying the area you are going to plant with a weed spray with chemicals like Roundup herbicide a few months before planting to wipe out your perennial weeds. Mother nature is excellent at taking good care of our adventures in the garden so she will put back what you take away. Once you have a second germination of weed seedlings use the Roundup herbicide spray again to take care of these new young weeds.


Then cover your bed wi
th 10 cms (4 inches) of mulch such as barley straw or pea straw or one can use pine needles. It you use meadow hay you will have the problems of all the wonderful seeds in the hay put back into the area you are preparing. Not a great idea.

Or....


(2) If you are not into sprays then take a large piece of black polythene and cover the same area over the lawn or weeds about 3 months before hand. Place weights around the big area of polythene to stop the wind removing it. Leave and the weeds will die underneath this covering. Once you are near the time of ready to plant you can then remove the cover and work up your soil to a fine tilt and cover with your mulch to prevent more weeds germinating.
Once the area is covered with mulch, the weeds are far and few between and can be easy be removed by hand. Make the bed easy for access from either side so you can control what it happening. Weeding, spraying, watering and fertilizing can be made easy.

Once your seedlings are ready to plant out, a string line with a long bamboo cane or pipe can be used. The cane can be marked at 40 cm (16 inches) intervals so one can plant at each mark and slide the cane along the string line to give you the correct spacing's. Plant your plants through the straw and replace the straw around the plants. This will reduce your weed re-growth and will conserve the moisture to the growing plants during the early to late summer. When the soil becomes dry begin to water them later in the season when they require it, The mulch will help retain the moisture held in the soil for the plants to take up easier.

For me... my eyes are bigger than my mind and I like to do things on a grand scale... sometimes the hard way.


Mind you I am trying to make it easier as I get older and the new knee joints slow me down a little. I just need more oil in the titanium joints... LO
L.

I have had someone cultivate the soil for me of a quarter acre lot and then prepare it to a fine tilt. Once the area in ready... It is time to begin the planting.